Working Remotely
Self Help While Working Remotely: Instructions for Common Issues
This is a live document. It will be added to as issues and questions common to most CPHA staff come up. If you have a suggestion for something that could appear here please forward it to me. Thanks for your assistance.
Phil
Section 1: FilemakerPro - using it remotely
Filemaker Pro when working Remotely
- Make sure you have the VPN connection active.
- Launch FilemakerPro. Click on the HOSTs button on the first window that pops up.
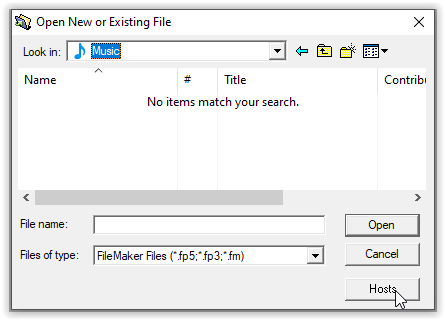
- The list of FMPro file names is likely blank.
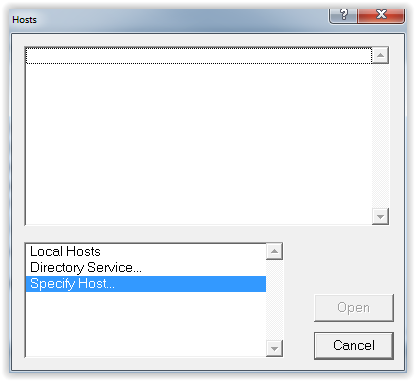
- Click on Specify Host… in the bottom list… a new Specify Host dialogue window pops up.
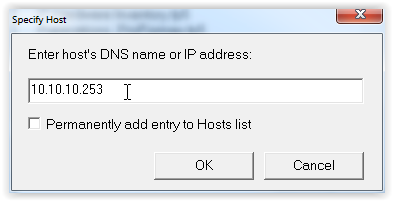
- Enter 10.10.10.253 in the IP address field and click OK (NOTE: DO NOT check the “Permanently add…” checkbox).
- Is the usual list of FMPro filenames now displayed? If yes – make your choice and continue as usual.
Section 2: Printing
Printing
For most of us who primarily work in the office, the default printer is defined as Canon B&W on cphasrv5. Unless you change the default printer to be some other device or utility, your print job will land in the office. (I wonder how large that pile of paper will be when we all return?)
If you must print to paper and you have a printer at home you are free to install the necessary printer driver for your personal printer. Follow the installation instructions that came with the printer. Be sure to connect the printer to your notebook (USB or other) and power the printer on before beginning to install the printer driver. When done, and you're satisfied that the printer is working, set it as the default printer for the period of time you're working remotely from home.
You may also print to PDF. This is a great alternative to hard copy printing. You will find Adobe PDF in the list of printers when in the print dialogue window. Select Adobe PDF from the drop down list of printers. Save the PDF document to your desired folder when prompted.
Section 3: Passwords
Password Changing
The usual requirement for changing your network password every 90 days has been suspended. Some of you have already been made aware of this. This is confirmation that that is true. You will not be prompted to change your password as long as everyone is working remotely. However, once people begin to return to the office you will be required to change the password. You will be notified in advance when this becomes a requirement.
In the meantime there is nothing for you to do.
Section 4: General Problem Solving and Remote Assistance
Problem Solving and Remote Assistance
If you are experiencing a problem it may be necessary for me to log into your computer so I can see for myself and experience the problem directly. This helps to facilitate a resolution and generally is more efficient.
I will ask you to launch UltraViewer. To do this, click on the Windows Start Menu, scroll down to the 'U' section, drop down the Ultraviewer folder menu, and click on UltraViewer. A splash-styled screen will appear.
I will ask you to provide me with both the Your ID and Password numbers.
I will login and take control of your computer (mouse and keyboard). We will have a phone conversation while this is occurring so we can discuss the issue you're having.
Section 5: Outlook - Restoring Lost Connection to Shared Mailboxes
Lost Connection to Shared Outlook Mailboxes
This is an issue that concerns only some staff, and then some more than others. I you are not monitoring a mailbox other than your person mailbox then this section does not apply to you.
NOTE: When doing this Remotely you might make sure you've established a VPN connection before attempting STEP 3.
STEP 1 – Remove all the Shared Mailboxes that are not opening.
Removing any or all shared mailboxes from the list of available mailboxes in Mail Folders
- Click on File menu the choose Account Settings
- In the Account Settings drop down choose Account Settings
- In the Account Settings window, on the Email Tab, click on ‘Change’.

- In the Change Email Account window, click on More Settings... (at bottom right)

- In the Microsoft Exchange window, choose the Advanced tab.
- In the ‘Mailboxes’ section highlight the name of a Mailbox and click on the Remove button. Repeat this until the list is empty. Click Apply. When prompted ‘Are you sure’ click Yes.
- Click on Apply (bottom right), then click OK.
- In the next window Click Next.
- Finally, click Finish, then click Close.
STEP 2 – Restart the computer and log back in.
It may or may not be necessary to restart your computer. Try just restarting Outlook first and add back only one shared mailbox (See Step 3). If Step 3 is successful with the one mailbox then repeat Step 3 and continue adding back the rest of the mailboxes that you need.
- Close all Programs and Restart the computer (or just Outlook).
- Log back in and launch Outlook (Just launch Outlook if a restart was not necessary).
STEP 3 – Adding back all the Shared Mailboxes that were not opening.
Adding an additional mailbox to the list of available mailboxes in Mail Folders
- Click on File menu the choose Account Settings
- In the Account Settings drop down choose Account Settings
- In the Account Settings window, on the Email Tab, click on ‘Change’.

- In the Change Email Account window, click on More Settings... (at bottom right)

- In the Microsoft Exchange window, choose the Advanced tab.
- In the ‘Mailboxes’ section click on the Add button, and enter ‘accountname’ in the Add Mailbox field (not including quotes) – then click OK.
- The account’s Full Name will now appear in the list of “Open these additional mailboxes:”.
- Repeat until all Shared Mailboxes you need have been added to the list.
- Click on Apply (bottom right), then click OK.
- In the next window Click Next.
- Finally, click Finish, then click Close.
Step 4 – Summary
- Attempt to open one of the shared folders. Click on the small arrow to the left of the name

- Any luck? If not review the instructions to ensure you followed all the steps. If you followed the steps, and there's still a problem, send me an email and we'll follow procedures in Step 4.
Section 6: 3CX Softphone and Misbehaving Headset
Phone headset not working properly
This is infrequently a problem but in the first 2 weeks several people have experienced headsets that were not behaving properly. Here's a potential and simple fix.
- Click on the vertical blue-dot hamburger at the top centre of the 3CX application window
- In the pop-out menu that appears scroll about half way down and select Audio Options.
- In the Audio Options window, in the Audio Devices section, there are three drop down selectors: Microphone, Speaker and Ringing.
- In each case, drop down the configuration menu and select the option in the list that describes your headset.
- There are two headsets models floating around:
- Plantronics BT600 (wireless)
- Plantronics B5220 (corded)
- Click OK (at bottom of screen)
Section 7: UberConference - limitations
UberConference limitations - remotely and in-office
If you are not the host/organizer of an UberConference, you need to join the call using your laptop or by using a mobile phone or landline. Do not join using CPHA’s 3CX system. If you join the call from CPHA’s 3CX system, UberConference recognizes CPHA’s telephone number and you will displace the host/organizer, but you will not appear as being on the call and you will have no controls (including the ability to mute or unmute yourself).
Section 8: 3CX - Starting and Hosting a WebMeeting
Using 3CX WebMeeting to initiate Video Conferencing Now
Key Video Conferencing Features:
- Easy to use
- Leverages WebRTC technology enabling clientless video calls (nothing to download)
- Unlimited number of meetings and meeting duration
- Document Sharing
- Advanced online classroom features (not included here)
- Text Chat & File Transfer
- Screen Sharing
- Polling
- Whiteboard
- Share PDF
- Screen sharing
- Recording
- Create, schedule and manage calls (not included here)
- Use your smartphone using the 3CX WebMeeting app (not included here)
- Webinar functionality (not included here)
I Part 1 - Start an Ad Hoc Meeting Now
II Part 2 - Schedule a Meeting (coming soon)
I. Start an Ad Hoc Meeting Now
- These instructions only cover initiating an ‘ad hoc meeting now’. The next instalment will deal with scheduling a meeting.
- You are encouraged to test this out and use it to interact with your colleagues. Once you are cool with the operations feel free to invite participants from the rest of the world.
- Certain of the functions will be explained in more detail n future updates.
- There is no time limit on the length of a meeting – nor limits on the number of meetings you can initiate. You can invite new participants once the meeting has started.
- If there are errors or glaring ambiguities in these instructions please bring them to my attention.
On the main 3CX window click on this icon  on the bottom menu bar. If you hover over this icon it will say “Start a 3CX WebMeeting Now”
Here is the content of the opening screen in the new browser tab
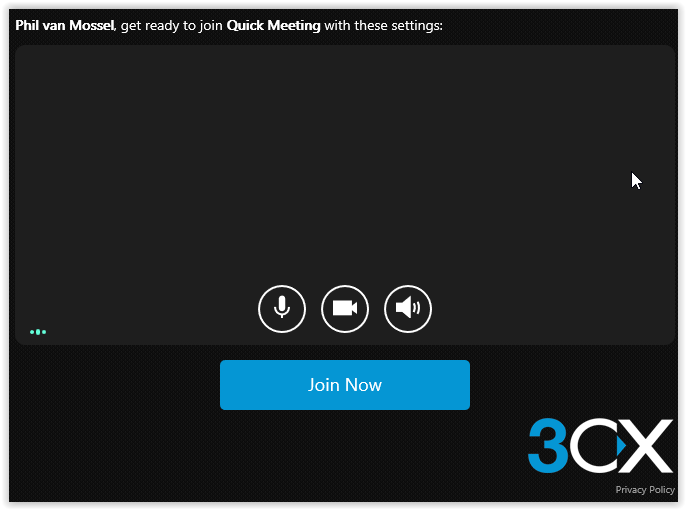
If this is first time you have used 3CX video conferencing you may be prompted to authorize 3CX to have access to your camera and microphone. If so and the name of both devices in the list is correct click DONE.


If this is not the first time you have used 3CX video conferencing and you have already authorized camera and mic access you will likely see your own video image on the Join Now screen, above.
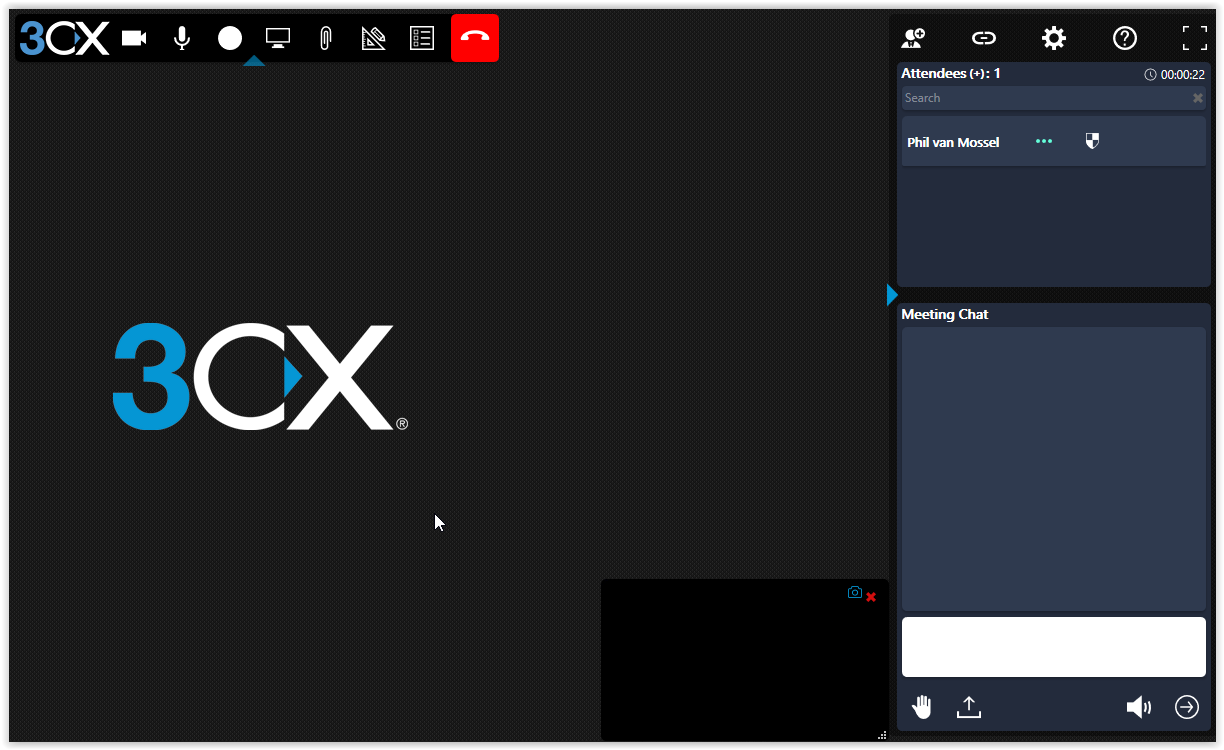
This is what you get after it connects. Your video will appear in the bottom right of the main panel.
- Open the 3CX Phone software window. It should already by open.
- Click on Start a 3CX WebMeeting Now
- A new tab opens in your default web browser
- Join the WebMeeting
- Inviting participants to your meeting – there are two ways to do that
- Invite People - click on this icon – top menu bar

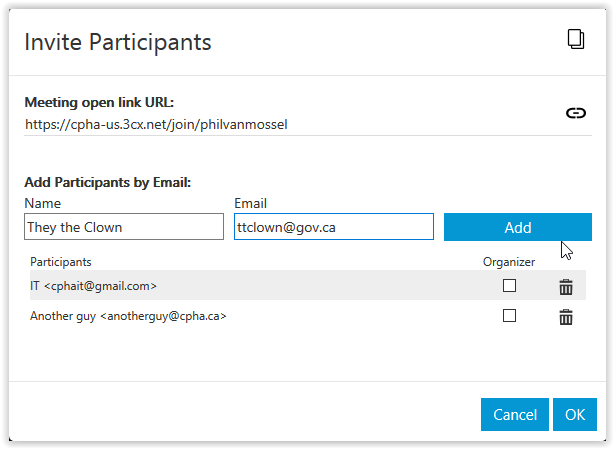
- Type in a participant’s name and their email address. Click on Add.
- Repeat until all your participants have been added to the list.
- Click OK to send the invite to your participants.
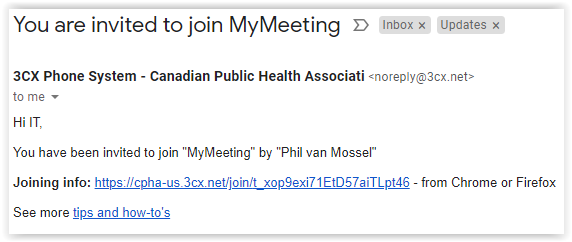
- Each recipient will receive this invite. All they need to do is click the link to join.
- Send participants a link by email - click on this icon – top menu bar

- This link copies the meeting URL so you can paste it into an email message.
- Prepare an email message, address it to all those you want to participate.
- Copy the link into the message.
- Send the message – the recipient clicks the link and they get this.

- They must enter a name before clicking Continue. Then they will get the Join prompt.
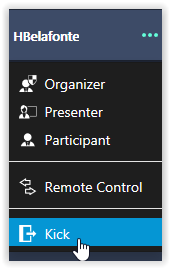
- They can enter ANY name, but if they enter the wrong name – you will be able to Kick them out of the meeting (“I don’t recognize them!”).
- Invite People - click on this icon – top menu bar
- Menu across the top of the screen

… from left to right
- Turn your own camera off or on
- Mute or Unmute your own audio
- Start Recording the meeting
- Start Screen Sharing
- Share PDF
- Whiteboard
- Start a new poll
- End Meeting
What a meeting of five might look like.
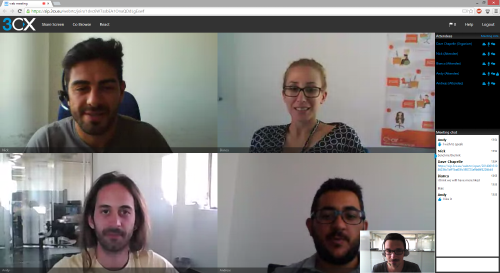
- Managing your meeting participants
Your name appears at the top of the participant list.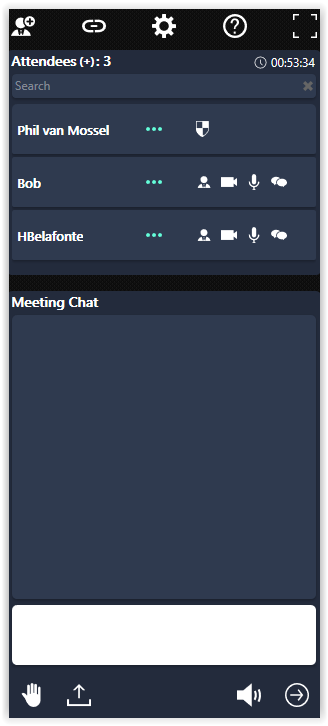
Using the icons to the right of each participant’s name:
- Change a participant to Organizer, Presenter or back to Participant
or
Kick a participant out of a meeting (is there a problem?) - Turn their camera off or on
- Mute or Unmute their mic
- Mute or Unmute their chat
Interact with your participants using the bottom portion of the above control panel:
- Chat – type in the white text area and click
 to send.
 - Toggle Chat on/off – click

- Upload a file to share – click

- React to what’s being said or illustrated, etc. – click
 and pick from the options
- Change a participant to Organizer, Presenter or back to Participant
Section 9: SPAM Filtering and Reporting
Daily SPAM Report
Updated 8 March 2021
All email coming into CPHA is scanned and evaluated against a number of objective criteria and third party SPAM tracking systems – to assess whether the message is ‘probably’ Spam, or not. Messages receive a score: if they pass they are delivered to your Inbox, if they fail they are quarantined.
At the beginning of each day, a link to a SPAM report is sent to your Inbox. The report lists all messages that were quarantined the previous day. Messages remain in quarantine for seven days and can be reviewed and/or retrieved anytime during that period. Quarantined messages are deleted after 7 days. No message is sent if there were no messages quarantined.
The system scanning all CPHA’s incoming email. There is nuance to determining if a message is Spam or not. Spam filtering is not perfect. Some Spam gets through and some good mail is blocked.
This system is transparent, allowing you to review quarantined email and to determine if the system is being a bit overzealous in blocking messages you think should be getting through. We are especially interested in email relevant to all Staff that is being blocked. We need to know about it. For example, there was a time when email notifications from the OrangeHRM Leave Management system were being blocked – messages from notifications1@orangehrmlive.com. We also want to ensure email from any of CPHA's mailing lists is not being blocked.
99.9% of the email quarantined is SPAM, and there is a lot of it. 99.9% of SPAM is unambiguously so. So this little check-and-see exercise should not be time consuming.
To rule out blocking of the above types of messages, we need to adjust the filtering criteria. There are a couple of things staff can do periodically over time to assist in making these global adjustments.
This is what I’d like you to do when you see a message like this in your Inbox…

Open it and click on the "web interface" link. The message itself no longer contains a list of affected messages (as 1 March 2021)

- After clicking on the web interface link a web page will open looking like the next image. If you highlight any message – the contents of that message will be displayed in the right pane – labelled Selected Mail.

- If the message is clearly from an address or from a list that you think others at CPHA may be affected by, please forward the SPAM Daily Report message to me – so we can make the necessary global system adjustments.
- Whitelisting: If the message is clearly from someone or from a list that you should be receiving and continue to receive mail from (personally) click on the Whitelist link on the right (under the date/time). Mail from this same email address will no longer be quarantine and will be delivered normally. Click OK. Note: if there is a message from notifications1@orangehrmlive.co - please whitelist it. You will only have to do this once.
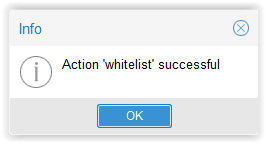
- You will then land on the Whitelist page – where all email addresses and/or domain names that have been whitelisted appear.
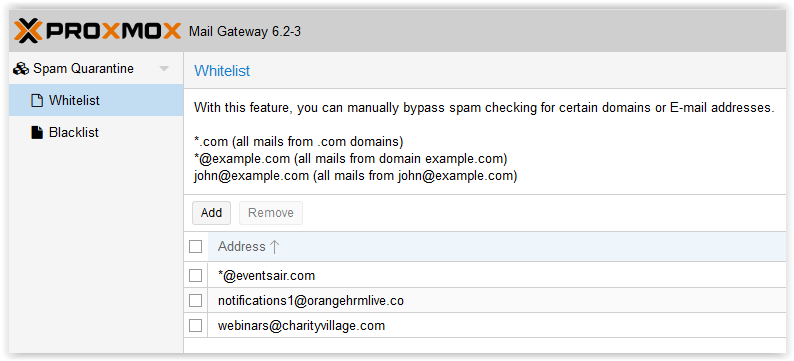
- You can review the white list. You can revoke any decision you’ve made and Remove any entry from the list. Check the box next to the item you want to remove – click Remove.
- To return to the current day’s SPAM report click Spam Quarantine at upper left of screen.
- f you would like to retrieve a message from quarantine – select the message in the list on the left, then click on Delivery icon – in the right pane (near to the Whitelist link). The message will be delivered to your Inbox.
Section 10: MS Teams - Part 1: Download and Installation
Teams - Download & Installation Instructions
Point your browser at https://teams.microsoft.com
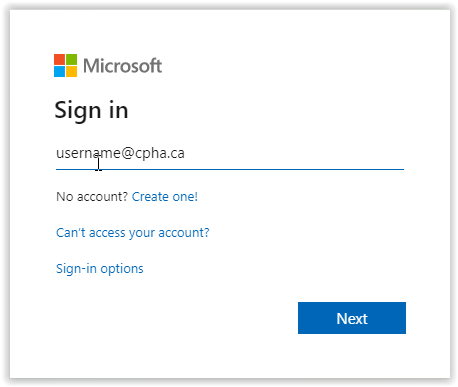
Enter your CPHA email address, then click Next
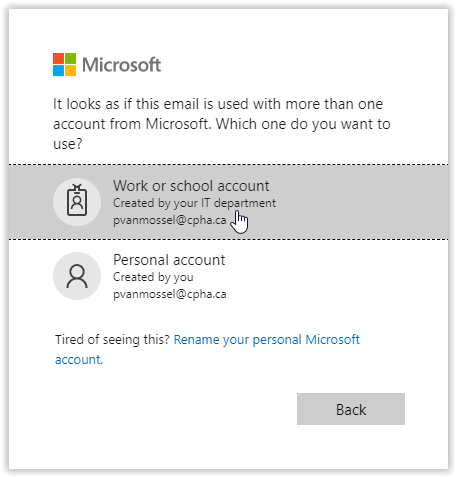
Click on Work or school account
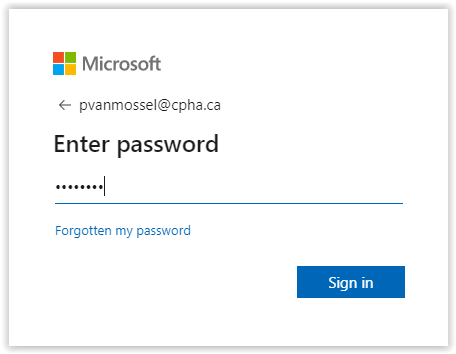
Enter your CPHA password – the same one that gets you into your notebook and into your email etc.
Click on Sign in.
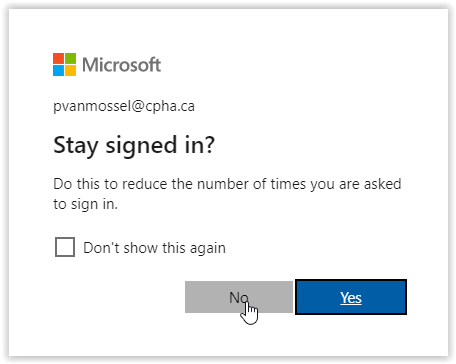
Click on No. Click on No for the time being. There may come a time when it makes sense to click on Yes.
Do not check the Don’t show this again check box.
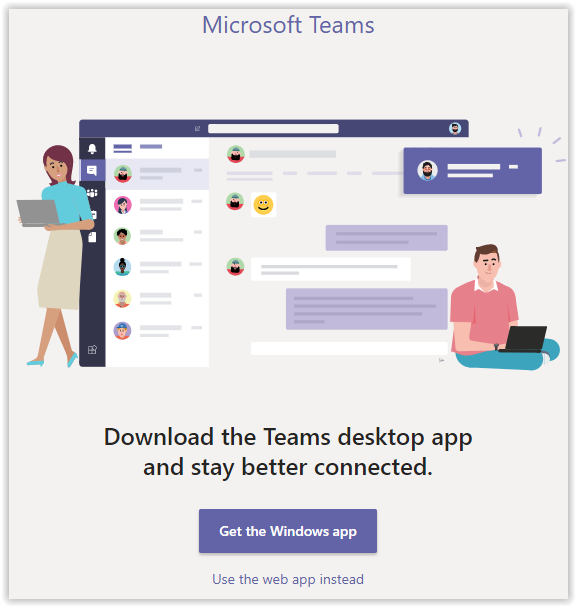
This is the opening screen after logging in.
Click on Get the Windows app. Do NOT click on Use the web app instead.
You will download the following file: Teams_windows_x64.exe – likely into your Downloads folder.
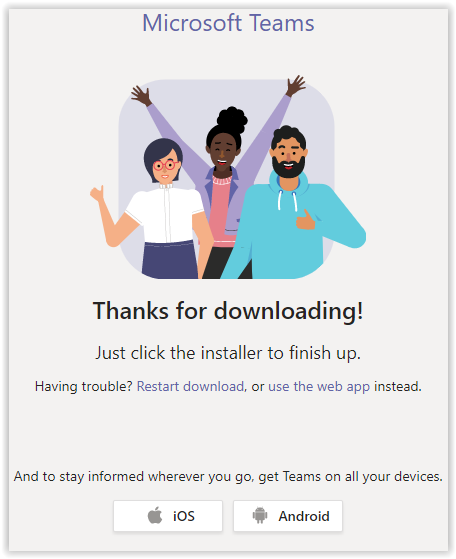
When the download is finished, open the Downloads folder, locate the Teams .EXE file, right click on the filename and choose Run as Administrator.
You will find the Microsoft Teams application in your windows Start menu looking like this.

Right-click on Microsoft Teams…

… hover over More, and click on Pin to taskbar.
Click on the Microsoft Teams icon in the taskbar - 
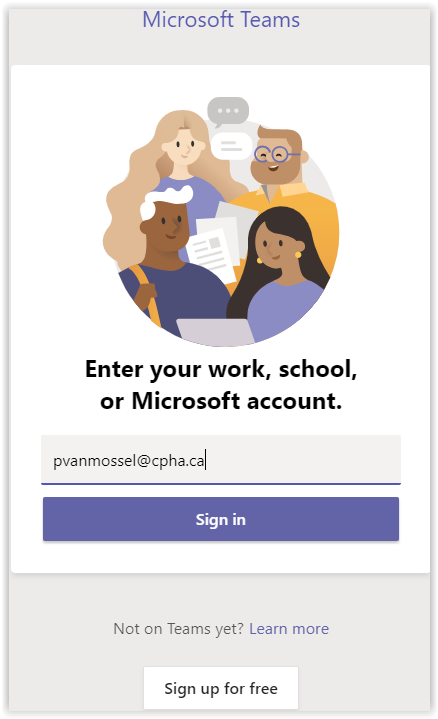
- If you happen to have logged out of the teams.microsoft.com site before completing this install you will get the Sign in screen above. If not already completed enter your CPHA email address and click Sign in. Once signed in you will land on the next screen in the next image.
- If you were still logged into the teams.microsoft.com site, you will get the following opening screen
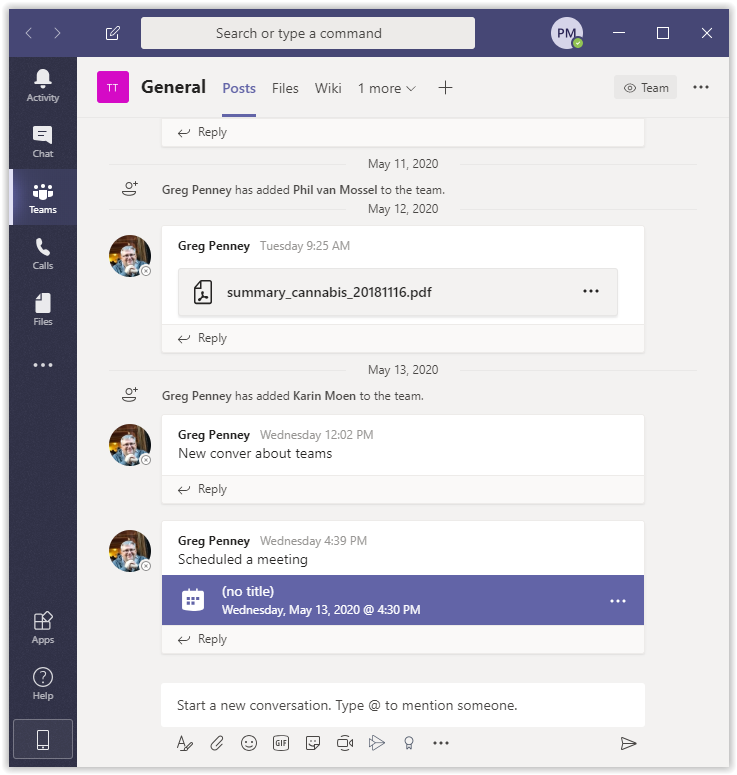
By default…
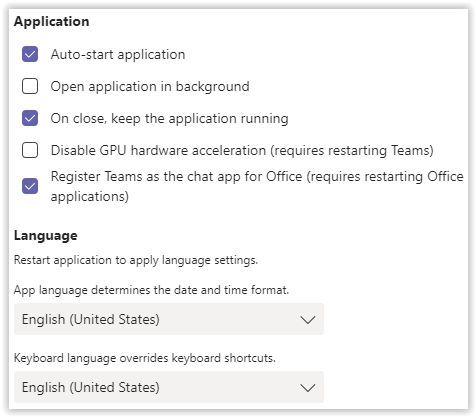
- MS TEAMS will auto-start when you login to your computer.
- MS TEAMS will keep running even if you close the applications.
- MS TEAMS is automatically registered as the chat app for MS Office (once the other Office apps have restarted after installing TEAMS – and going forward)
The next time you restart or login to your computer TEAMS will be automatically running.
Now that the Teams Desktop Application is installed
In Outlook Calendar on the Home tab, you will notice a New Teams Meeting menu icon
There is more to learn here about how this works in conjunction with the Teams Desktop application.
